Mac OS X : Pullprint - manual setup
To be able to print to UiB (pullprint) printers from your own private computer, you need a VPN connection.
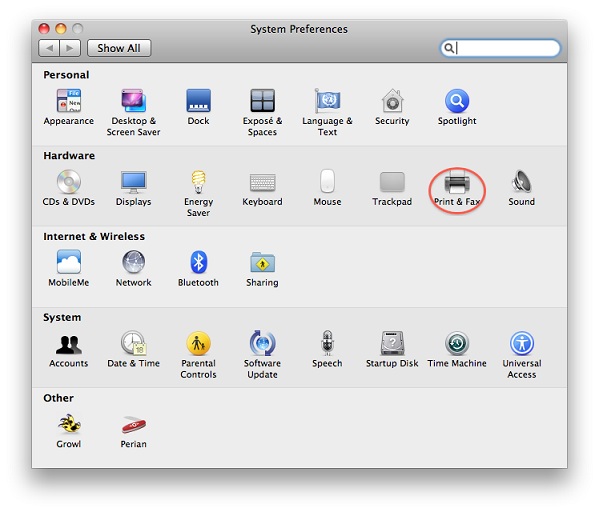
1. Enter "System Preferences" and choose "Print & Fax".
2. Click "+" to add a new printer.
File:AddPrinter eng.jpg
3. Click the Advanced button. If you do not have an "Advanced" button: Right-click the toolbar (Ctrl-click if you have just one mouse button) in the "Add printer" dialogue and choose "Customize toolbar". Then you can drag an "Advanced" button (looks like a gear wheel) to the toolbar.
4. Choose Windows as Type, an remeber to give the URL (see below).
  lpd://username@pullprint.uib.no/pullprinthp
  lpd://username@pullprint.uib.no/pullprinthp_ps (can be used to print in colors)
  lpd://username@pullprint.uib.no/pullprintricoh
  lpd://username@pullprint.uib.no/pullprintricoh_ps (can be used to print in colors)
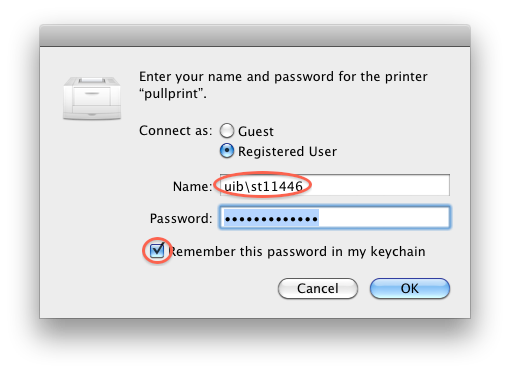
NB! It is important that you use your own username and password and not the words themselves.
5. Select a proper driver. It is best you choose the driver matching the make an model of the printer.
6. Click "Add".
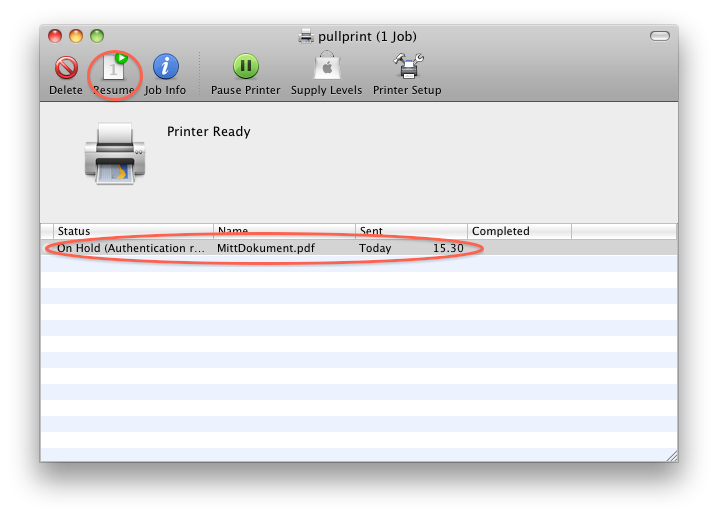
7. If you have not given your user information in step 4, it is likely that the print job will stop. This is because the system will be awaiting user authentication. Press the printer icon on th dock, then press Resume in the window where you can see the printer status. The pop up window where you can give your user information will appear.
See also Pullprint.


