Mac OS X: Connecting to your network share: Difference between revisions
From IThelp
No edit summary |
No edit summary |
||
| Line 14: | Line 14: | ||
smb://uib;st1234@klient.uib.no/felles | smb://uib;st1234@klient.uib.no/felles | ||
Servernavnet er ''klient''. | Servernavnet er ''klient''. | ||
Navnet på katalogen er ''felles''. | Navnet på katalogen er ''felles''. ''' | ||
[[Category:BRA]] | [[Category:BRA]] | ||
Revision as of 16:24, 22 August 2014
Employees
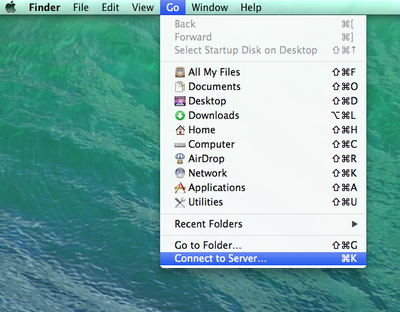
- In Finder: Go -> Connect to Server, or use the key combination cmd + k.
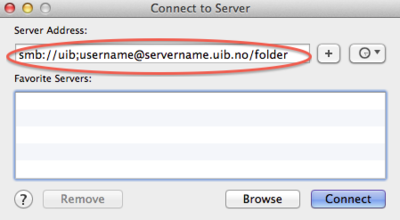
- Type in smb://uib;username@ and then the servername and foldername. It should be on the form servername.uib.no/folder. Click Connect. NB! There should be no spaces.
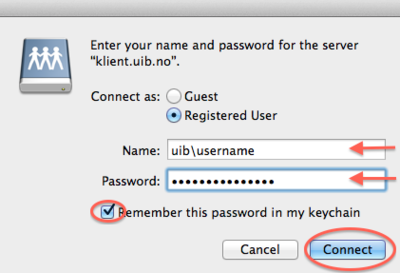
- Make sure the domain (uib for employees) and username is entered, type in your password and click Connect.
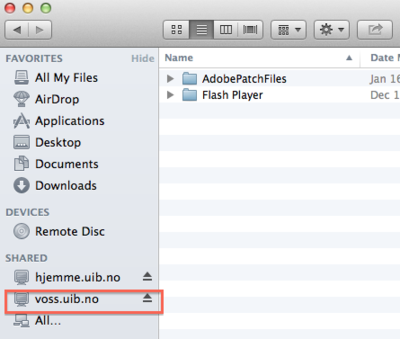
- Your network share will be listed as a network drive in Finder.


  (*)
  For step 2 and 3 please remember:
  The word username must be replaced with your own username.
  The word servername must be replaced with the name of the server that contains yout network share.
  The word foldername must be replaced with the name of the folder on the given server where your network share can be found. Some departments/institutes has severel folder.
Eksample:
  smb://uib;st1234@klient.uib.no/felles
  Servernavnet er klient.
  Navnet på katalogen er felles.
