VPN configuration in Windows 8
NB! You have to be connected to either Wi-Fi or a ethernet cable for the vpn to work.
Step 1: Right-click on the network icon, who lay to the right on the taskbar, either formed as a computer screen or a set of stairs.
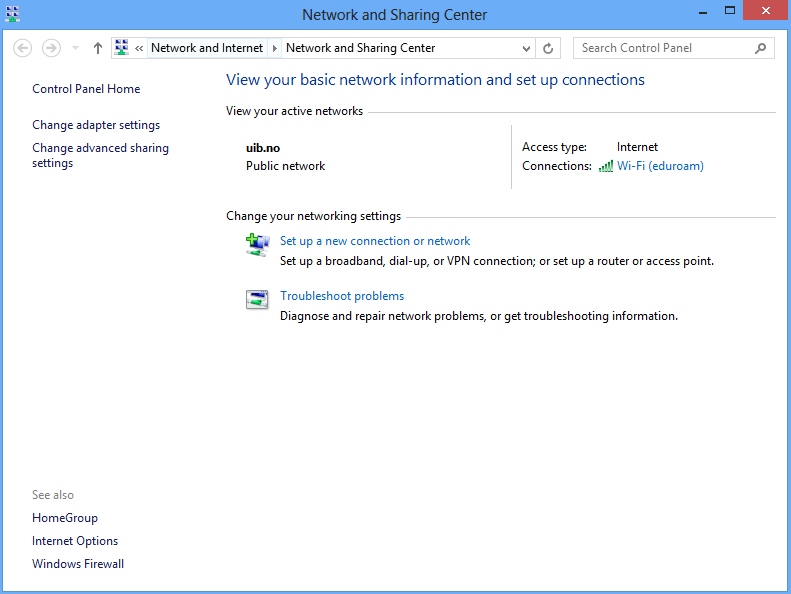
Step 2: Click on the “Open network and sharing centre”
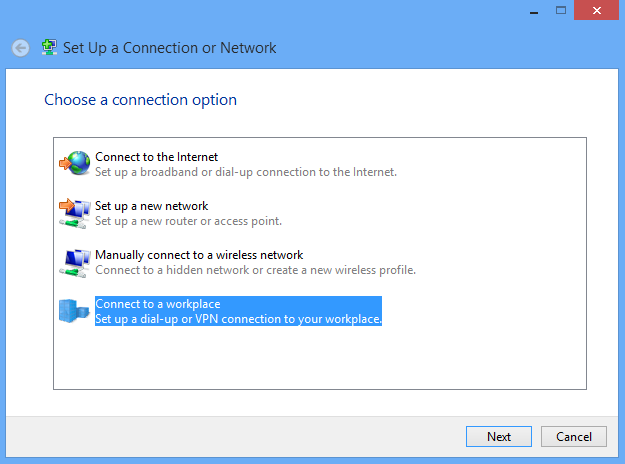
Step 3: Choose the “Connect to a workplace” and press “Next”
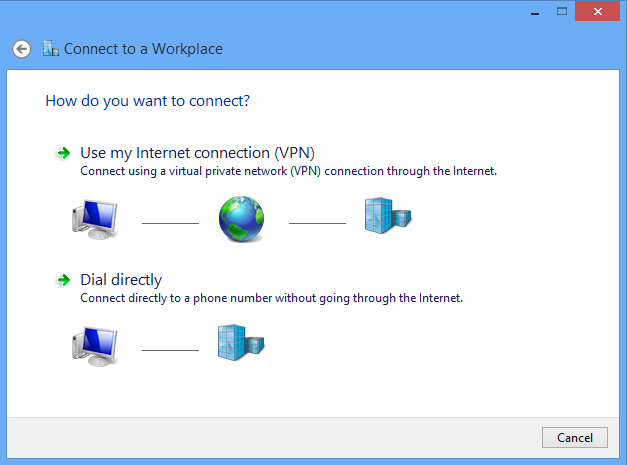
Step 4: Click on “Use my internet connection(vpn)”
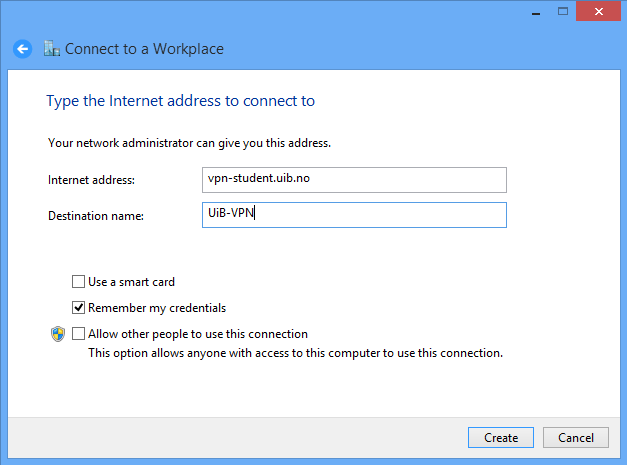
Step 5: Type in “vpn-ansatt.uib.no” in the field “internet address” if you are an employee. Type in “vpn-student.uib.no” if you are a student.
You can give the connection an optional name in the field “destination name” e.g UIB-VPN and press “next”.
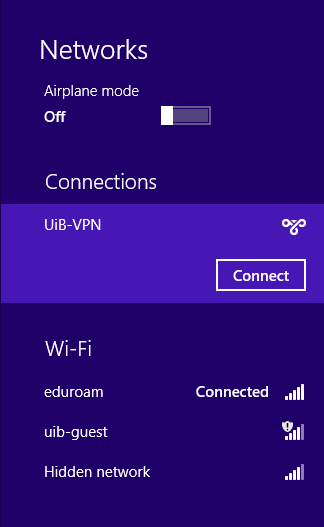
Step 6: You will see the connection displayed in the list of networks, click on the connection with the name you just gave the vpn connection and chose “Connect”
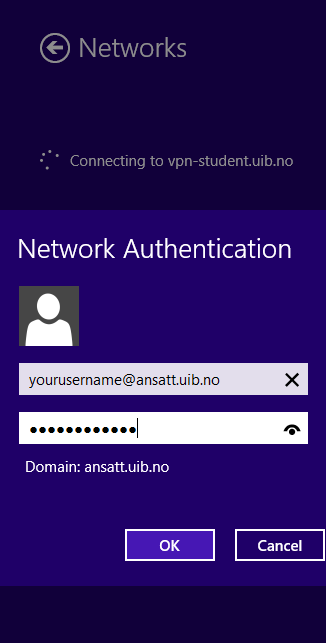
Step 7: Type in your user name followed by “@ansatt.uib.no” in the field “user name” (“@student.uib.no” if you are a student) and enter your UIB-password in the field “password” and press “Ok”.
Step 8: You should now be connected to UiB with vpn. If you wish to disconnect, just click on the network item to the right side of the toolbar and press “Disconnect” to disconnect the vpn connection.

