Windows - Software Center: Difference between revisions
Just a few changes to the phrasing with regards to current information, and the language/grammar in general. |
mNo edit summary |
||
| Line 1: | Line 1: | ||
[[no:Windows - Software Center]] | [[no:Windows - Software Center]] | ||
'''Windows Software Center is the IT divisions solution for software distribution on UoB computers with Windows operating system. The solution is based on self service, making users able to add | '''Windows Software Center is the IT divisions solution for software distribution on UoB computers with Windows operating system. The solution is based on self service, making users able to add software programs themselves. This assumes the software is either free, or that UoB has signed a license agreement, which means that staff and students at UoB can use the given software (for study or business).''' | ||
There are a few exceptions. Some available software programs require a personal license. This information should be displayed under '''Description'''. | There are a few exceptions. Some available software programs require a personal license. This information should be displayed under '''Description'''. | ||
Revision as of 15:14, 14 February 2018
Windows Software Center is the IT divisions solution for software distribution on UoB computers with Windows operating system. The solution is based on self service, making users able to add software programs themselves. This assumes the software is either free, or that UoB has signed a license agreement, which means that staff and students at UoB can use the given software (for study or business).
There are a few exceptions. Some available software programs require a personal license. This information should be displayed under Description.
How to install programs
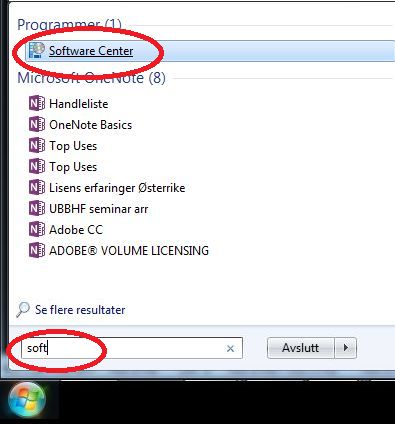
To add an application, you must first start Software Center. To start, search for it in the Windows Start Menu. Click "Start/Windows-button" at the lower left corner and type "Software Center" in the search field.
Start the application by clicking on it.
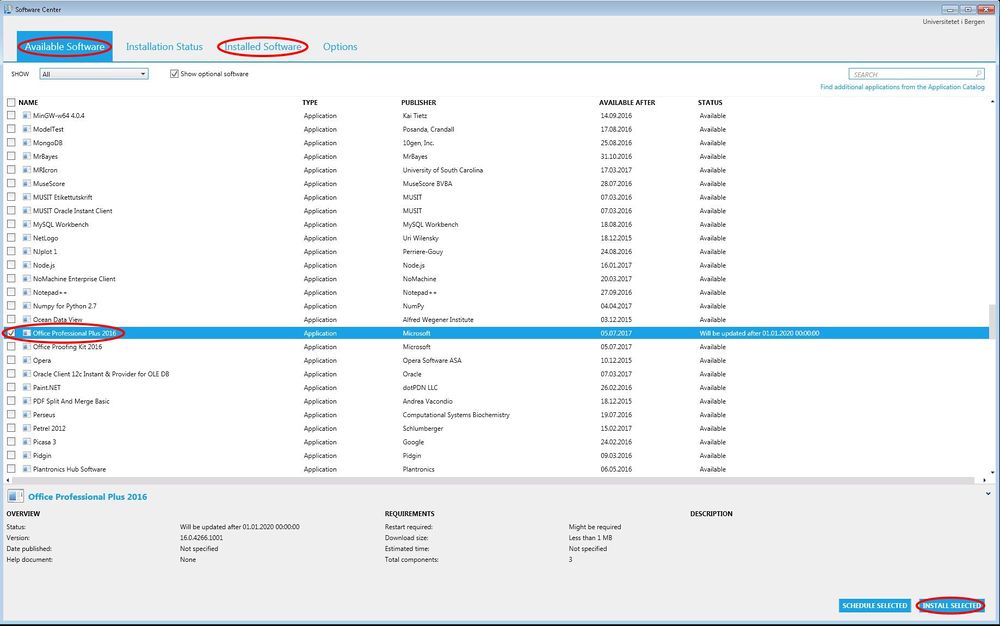
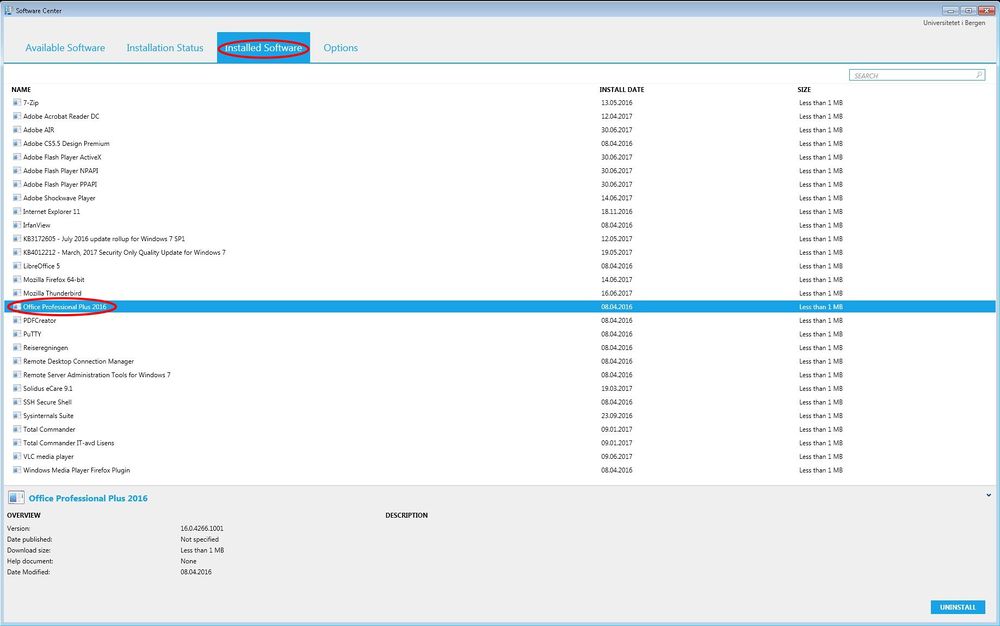
Software Center displays available software for the user to download under (Available Software) and installed software under the tab (Installed Software)
In this example, we wish to upgrade to Office Professional Plus 2016. Click the checkmark on the left side directly in front of the application you wish to add, then click on "INSTALL SELECTED" in the lower right corner.
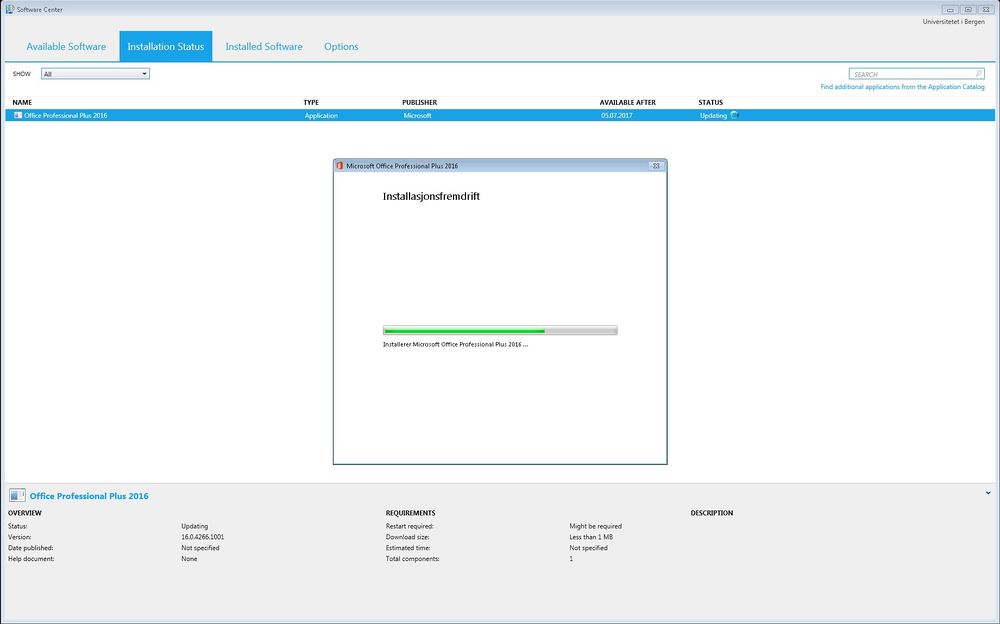
Software Center then switches to the tab "Installation Status" automatically.
After a while, depending on the size of the application and connection speed, the status changes to Installed. You can now find the program under the tab (Installed Software).
Restricted software that require a license
Most programs that are licensed can not be added without a valid license. You must submit an issue though IssueTracker https://bs.uib.no/ and refer to the PM-number from the ordering system where the license was purchased. The IT-department will then add the licensed program to the "Software Center" in order for you to download and install it.
Licensed programs such as "Adobe Creative Cloud (CC)"' can be installed, however they will not be working correctly without logging in with an valid Adobe ID with an active Adobe subscription. (More information about Adobe Crative Cloud can be found here)


