VPN configuration in Windows 8: Difference between revisions
No edit summary |
No edit summary |
||
| Line 29: | Line 29: | ||
Step 5: Type in “vpn.uib.no” in the field “internet address” . | Step 5: Type in “vpn-ansatt.uib.no” in the field “internet address” if you are an employee. Type in “vpn-student.uib.no” if you are a student. | ||
You can give the connection an optional name in the field “destination name” e.g UIB-VPN. Press “Create” to create the VPN connection. | You can give the connection an optional name in the field “destination name” e.g UIB-VPN. Press “Create” to create the VPN connection. | ||
[[File: | [[File:addressVPNWin8.png]] | ||
| Line 42: | Line 42: | ||
Step 7: Type in your user name followed by '''“@uib.no”''' in the field “User name” and enter your UIB-password in the field “Password” and press '''“Ok”'''. | Step 7: Type in your user name followed by '''“@ansatt.uib.no”''' in the field “User name” '''(“@student.uib.no” if you are a student''') and enter your UIB-password in the field “Password” and press '''“Ok”'''. | ||
[[File: | [[File:usernameVPNWin8.png]] | ||
Revision as of 12:26, 14 December 2017
NB! You have to be connected to either Wi-Fi or a ethernet cable for the VPN to work.
The VPN connection needs to be set up while you are on the UiB-network(using eduroam or uib-guest).
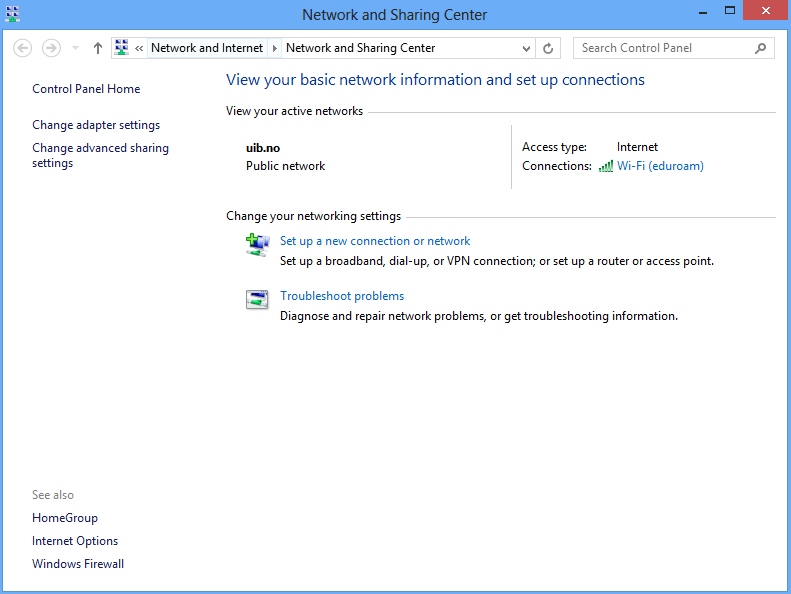
Step 1: Right-click on the network icon, who is in the bottom right corner on the taskbar. It is either formed as a computer screen or a set of stairs. Click on the “Open Network and Sharing centre”.
Step 2: Click on the option “Set up a new connection or network”.
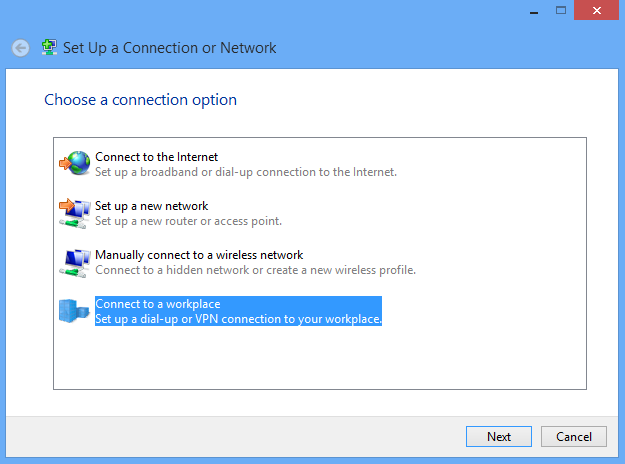
Step 3: Choose the “Connect to a workplace” and press “Next”.
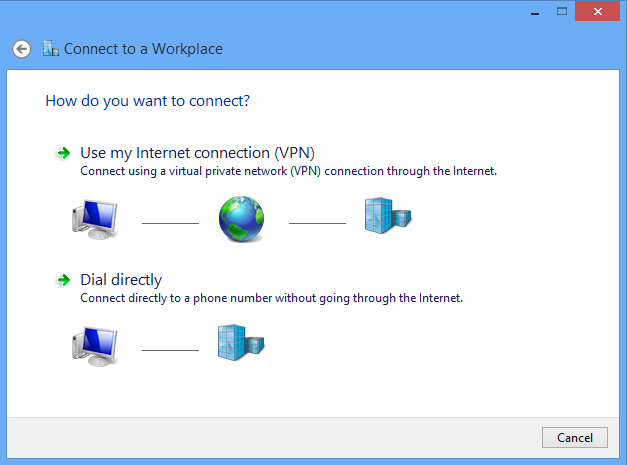
Step 4: Click on “Use my internet connection(VPN)”.
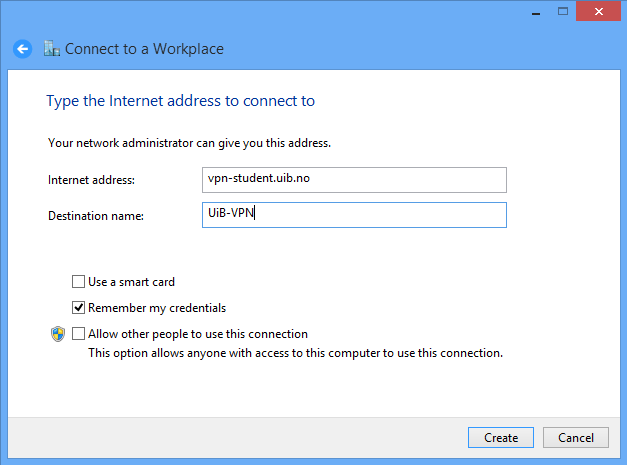
Step 5: Type in “vpn-ansatt.uib.no” in the field “internet address” if you are an employee. Type in “vpn-student.uib.no” if you are a student.
You can give the connection an optional name in the field “destination name” e.g UIB-VPN. Press “Create” to create the VPN connection.
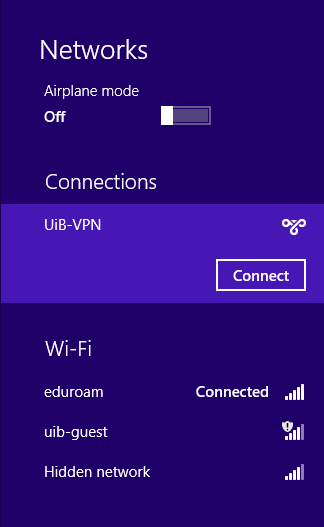
Step 6: You will see the connection displayed in the list of networks, click on the connection with the name you just gave the VPN connection and chose “Connect”
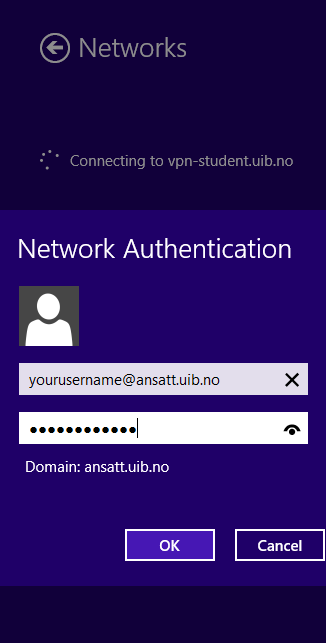
Step 7: Type in your user name followed by “@ansatt.uib.no” in the field “User name” (“@student.uib.no” if you are a student) and enter your UIB-password in the field “Password” and press “Ok”.
Step 8: You should now be connected to UiB with VPN. If you wish to disconnect, just click on the network item to the right side of the toolbar and press “Disconnect”.

