Connecting to UiB wireless from a Mac: Difference between revisions
Created the guide. |
No edit summary |
||
| Line 1: | Line 1: | ||
Click the wireless icon in the top right corner of your screen. Choose (or add and choose) the right SSID, which is UiB (upper case U, lower case i, upper case B). | Click the wireless icon in the top right corner of your screen. Choose (or add and choose) the right SSID, which is UiB (upper case U, lower case i, upper case B). {{Outdated}} | ||
Revision as of 17:02, 12 October 2015
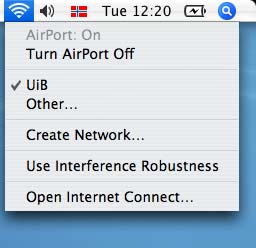
Click the wireless icon in the top right corner of your screen. Choose (or add and choose) the right SSID, which is UiB (upper case U, lower case i, upper case B).
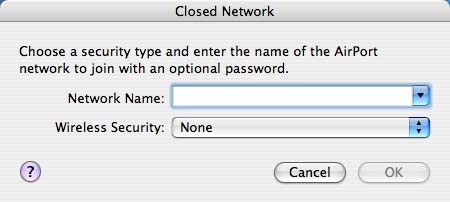
On the machine used in this example the ID has already been entered. The first time you connect you might have to add it by choosing ”Other...” an entering UiB in the field called Network Name. There is no need to change the security settings.
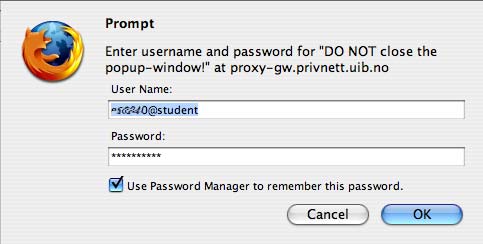
Open your web browser (ex. Safari, Firefox or Opera) and enter your user information in the pop up window that appears.
Students must write their user ID the following way: username@student.uib.no
Employees must write their user ID the following way: username@ansatt.uib.no
The word username must of course be exchanged for each users proper username (the one used when logging into a UiB computer). The password here is also the same as the one used when logging into a UiB computer or an other UiB service.


