Mac OS X: Setting up an account in Mail: Difference between revisions
No edit summary |
No edit summary |
||
| Line 62: | Line 62: | ||
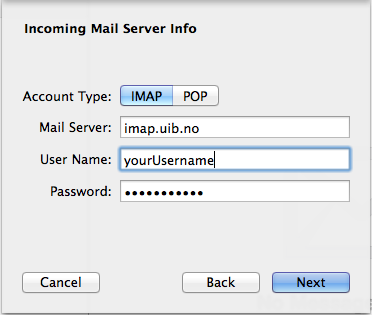
5. Incoming Mail Server Info: | 5. Incoming Mail Server Info: | ||
'''Account Type:''' IMAP | '''Account Type:''' IMAP | ||
'''Mail Server :''' imap | '''Mail Server :''' imap.uib.no | ||
'''User Name :''' Your UiB Username | '''User Name :''' Your UiB Username | ||
'''Password :''' Your UiB password | '''Password :''' Your UiB password | ||
<br/>[[File: | <br/>[[File:IMAPin.png]]<br/> | ||
<br/> | <br/> | ||
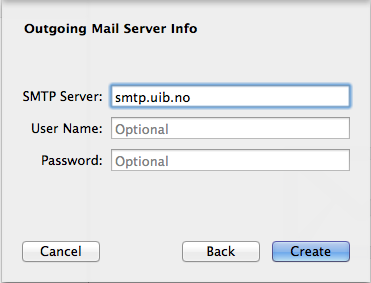
6. Outgoing Mail Server Info: | 6. Outgoing Mail Server Info: | ||
'''SMTP Server :''' smtp | '''SMTP Server :''' smtp.uib.no | ||
'''User Name :''' Leave empty | '''User Name :''' Leave empty | ||
'''Password :''' Leave empty | '''Password :''' Leave empty | ||
<br/>[[File: | <br/>[[File:SMTPOut.png]]<br/> | ||
<br/> | <br/> | ||
'''Note:''' Login might take a while <br/>[[File: | '''Note:''' Login might take a while <br/>[[File:SMTPwait.png]]<br/> | ||
<br/> | <br/> | ||
Revision as of 15:08, 25 August 2014
The standard E-mail client for Mac is Mail
Setting up an Exchange account in Mail (only for employees with an Outlook membership)
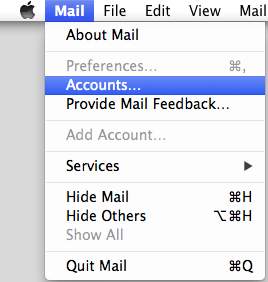
1. Go to Mail -> Accounts...
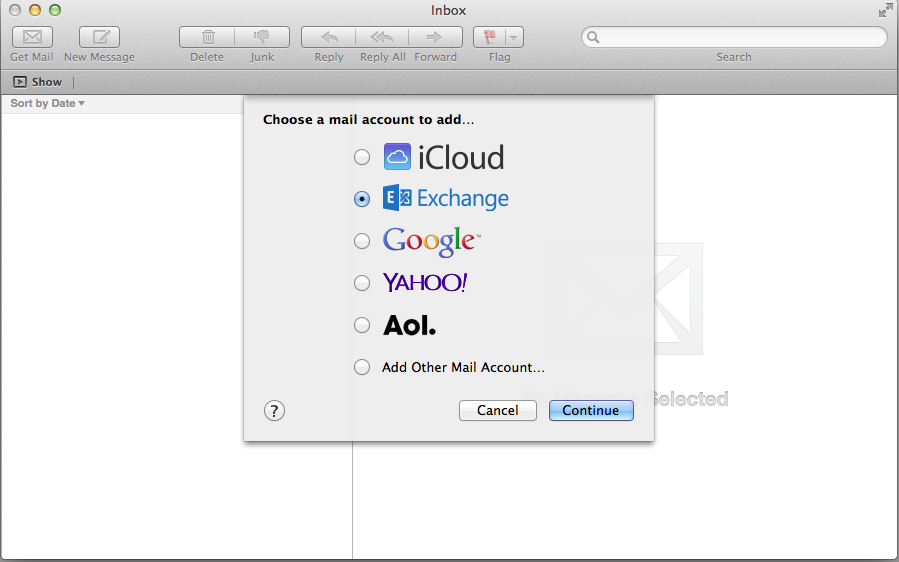
2. Choose Exchange and press Continue
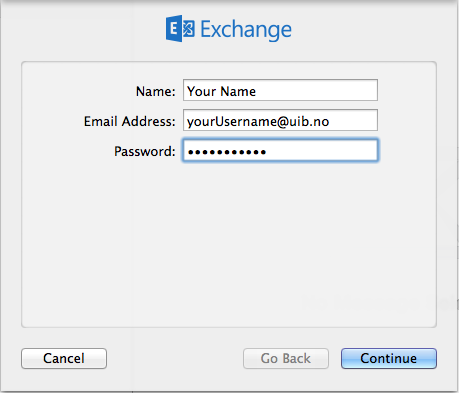
3. Enter your name, e-mail address and password. Press Continue
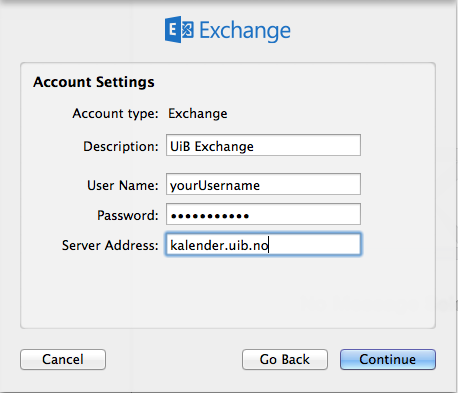
4. Enter an account description, your UiB username and password. The server Address is kalender.uib.no. Press Continue
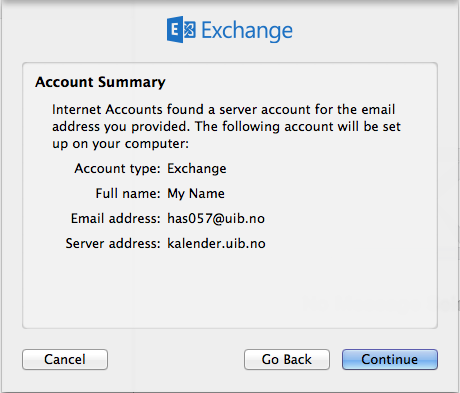
5. Proof read the info and press Continue
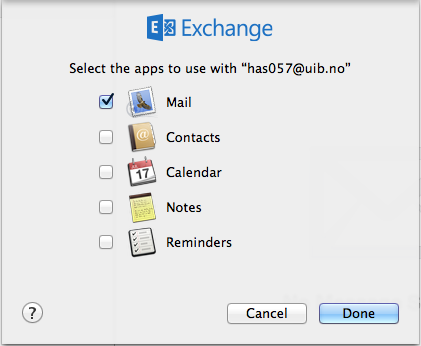
6. Choose the apps to use with your account and press Done
Setting up IMAP account in Mail as an employee
1. Go to Mail -> Accounts...

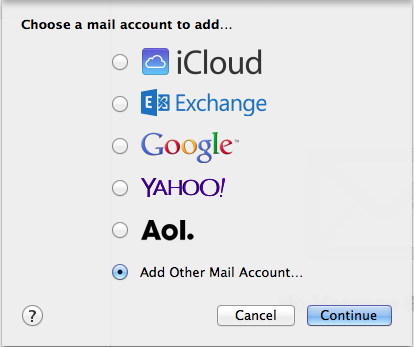
2. Choose Add Other Mail Account... and press Continue
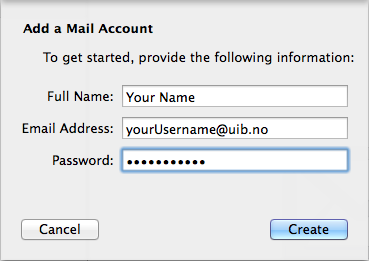
3. Insert your name, your E-mail address and password. Press Create
4. You will get a message saying Account must be manually configure, press Create one more time 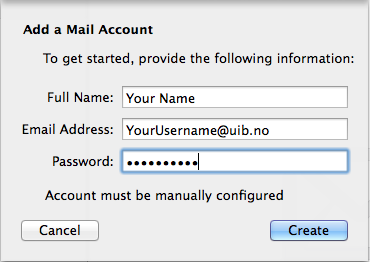
5. Incoming Mail Server Info:
Account Type: IMAP
Mail Server : imap.uib.no
User Name   : Your UiB Username
Password    : Your UiB password
SMTP Server : smtp.uib.no
User Name   : Leave empty
Password    : Leave empty
Note: Login might take a while 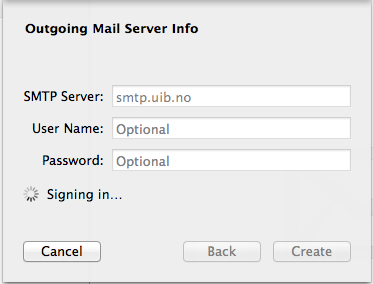
7. To send messages outside UiB, see Advanced settings in IMAP
Setting up IMAP account in Mail as a student
1. Go to Mail -> Accounts...

2. Choose Add Other Mail Account... and press Continue

3. Insert your name, your E-mail address and password. Press Create 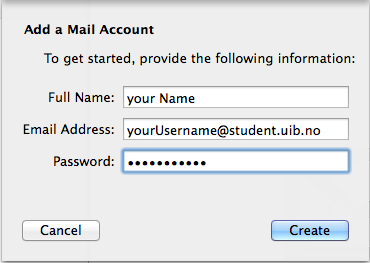
4. You will get a message saying Account must be manually configured, pressCreate one more time 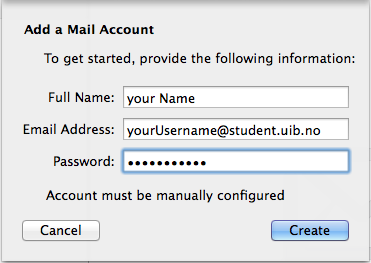
5. Incoming Mail Server Info:
Account Type: IMAP
Mail Server : imap.uib.no
User Name   : Your UiB Username
Password    : Your UiB password
6. Outgoing Mail Server Info:
SMTP Server : smtp.uib.no
User Name   : Leave empty
Password    : Leave empty
Note: Login might take a while 
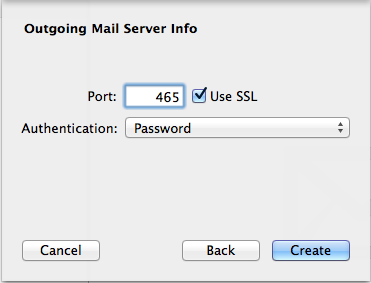
7. If you are asked for the Port for Outgoing Mail Server Info, setting shall be as followed:
Port        : 465
Authenti... : Password
Make sure "Use SSL" is checked
8. To send messages outside UiB, see Advanced settings in IMAP
Advanced settings for IMAP
1. Go to Mail -> Preferences
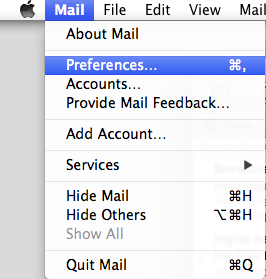
2. Go to Accounts, choose the appropriate account in the menu to the left. 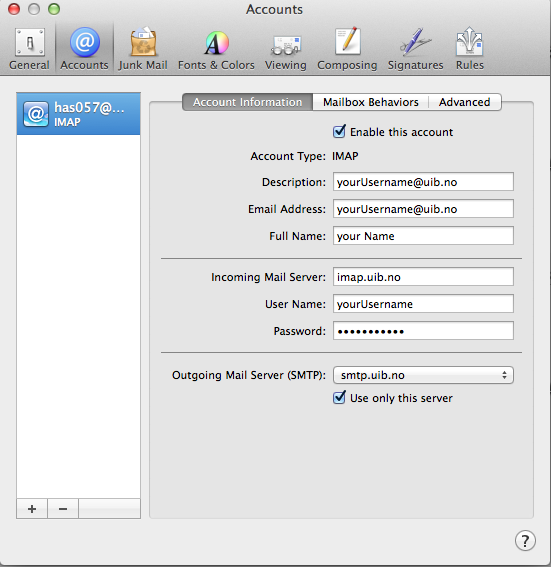
3. Outgoing Mail Server SMTP: -> Choose Edit SMTP Server List 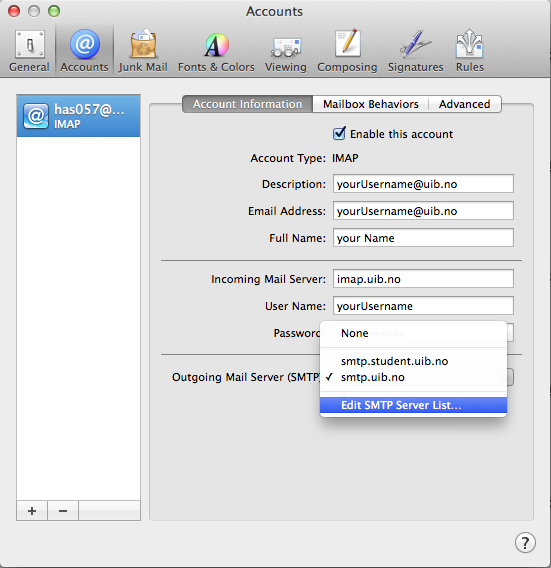
4. Check the settings:
Use custom port: 465
Check Use Secure Sockets Layer(SSL)
Authentication: Password
User Name: Your UiB User name
Password: Your UiB Password
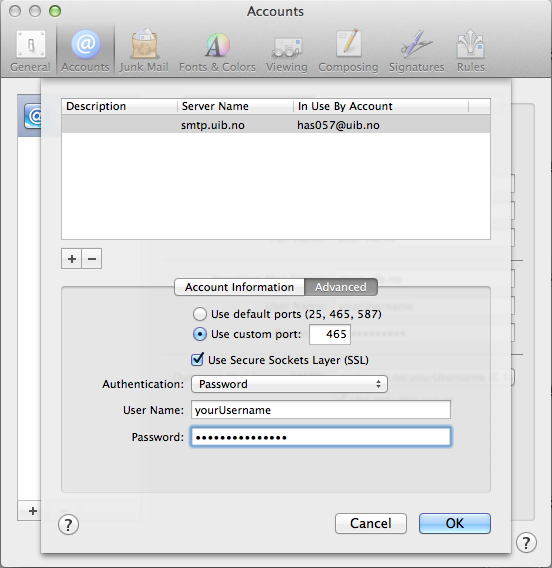
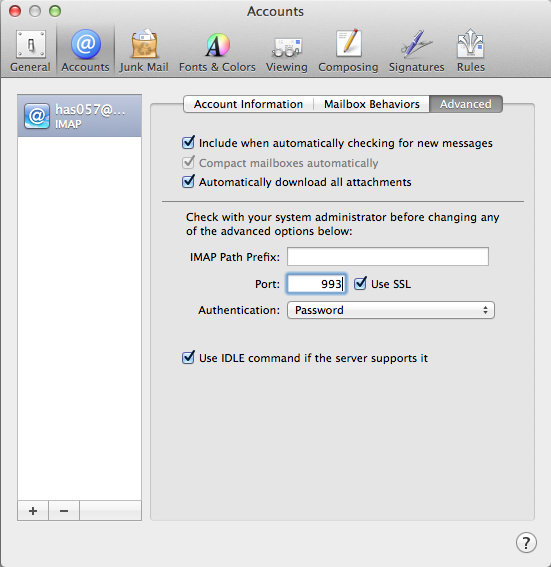
5. Go to Advanced, fill in the following:
IMAP Path Prefix: Leave empty
Port: 993
Authentication:  Password.

