Mac OS X: Setting up an account in Mail: Difference between revisions
From IThelp
m (St11446 moved page Setting up an account in Mail (Mac) to Mac OS X: Setting up an account in Mail) |
No edit summary |
||
| Line 1: | Line 1: | ||
[[no:Oppsett av e-post i Mail | [[no:Mac OS X: Oppsett av e-post i Mail]] | ||
Mail is the name of Apples mail client. | Mail is the name of Apples mail client. | ||
Revision as of 17:06, 7 August 2014
Mail is the name of Apples mail client.

Setting up an Exchange account in Mail (only for employees with an Outlook membership)
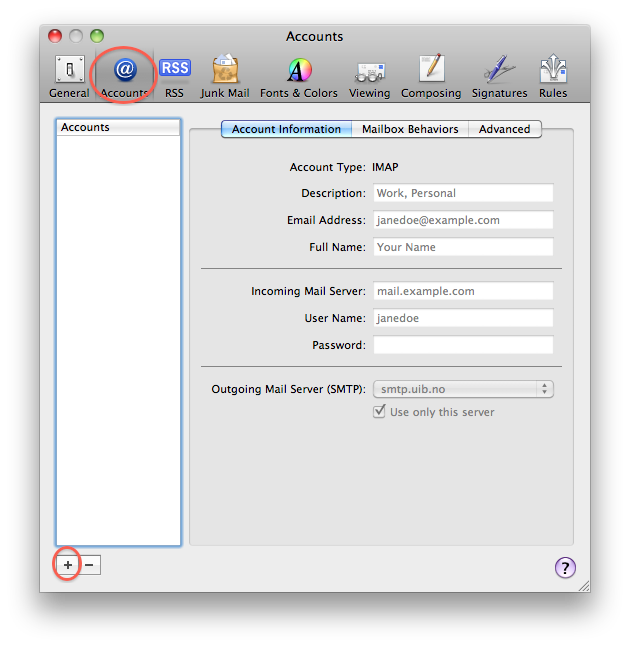
- Go to Mail -> Preferences. Choose Accounts press the plus sign to add a mail account.
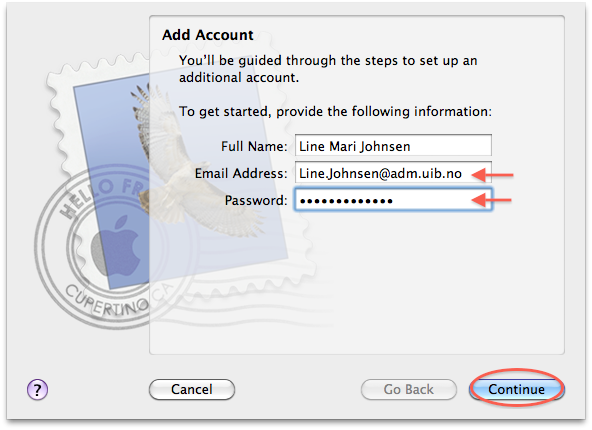
- Type in your mail address and your password.
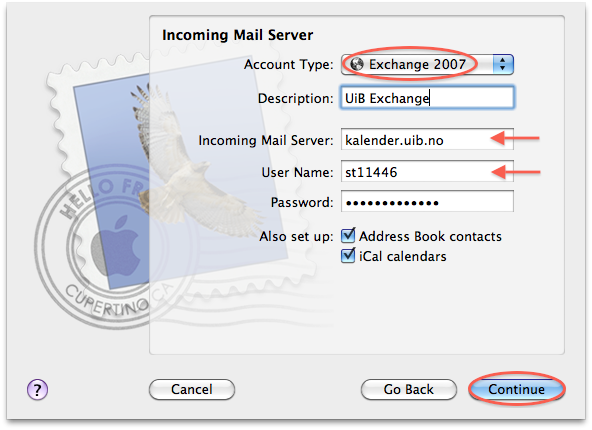
- Choose "Exchange 2007" as the account type, set kalender.uib.no as incoming server and make sure the right user name is listed.
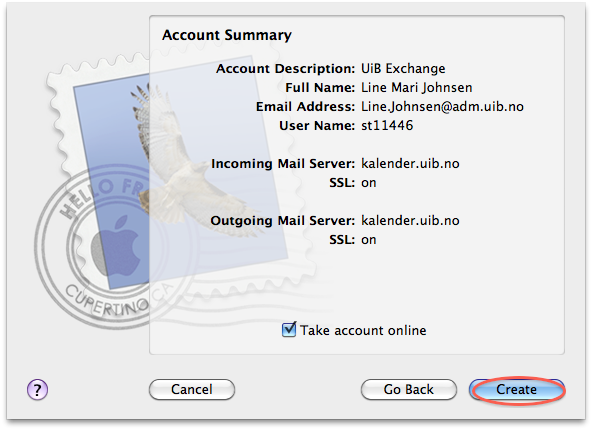
- Check the information and press Create to create the account.


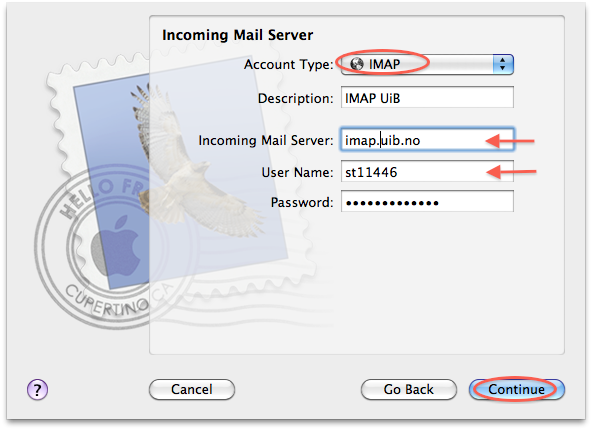
Setting up an IMAP account in Mail as an employee
- Go to Mail -> Preferences. Choose Accounts press the plus sign to add a mail account.
- Type in your mail address and your password.
- Choose "IMAP" as the account type, set imap.uib.no as incoming server and make sure the right user name is listed.
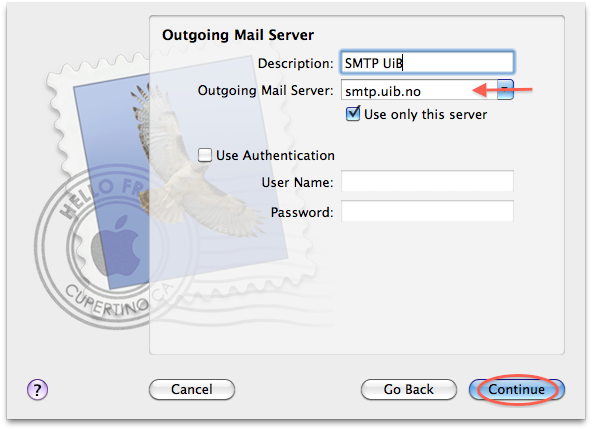
- Set smtp.uib.no as outgoing server.
- Press Create, in the next window, to create the account.
For the account to work off campus the following steps must also be completed: - Go to Mail->Preferences->Accounts and mark/choose the account.
- Press the arrows next to Outgoing Mail Server, choose Edit SMTP Server List... and then Advanced.
- Choose Use custom port and type in 465.
- Check the box indicating the use of SSL, choose password authentication and fill in your user information.


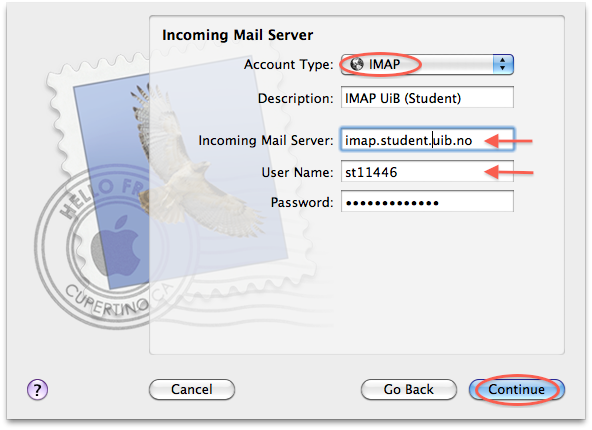
Setting up an IMAP account in Mail as a student
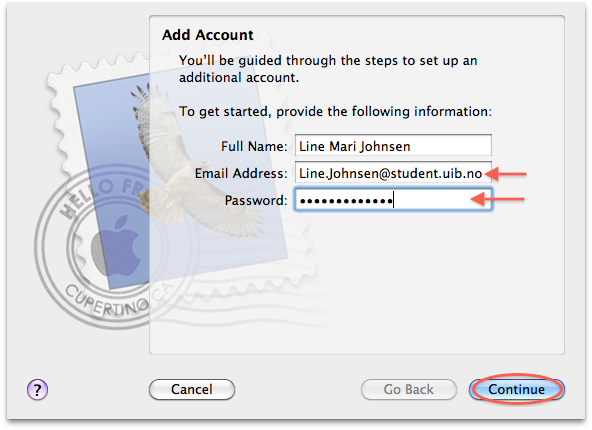
- Go to Mail -> Preferences. Choose Accounts press the plus sign to add a mail account.
- Type in your mail address and your password.
- Choose "IMAP" as the account type, set imap.student.uib.no as incoming server and make sure the right user name is listed.
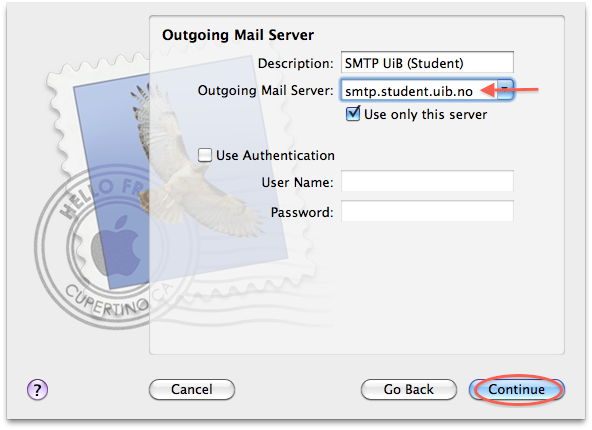
- Set smtp.student.uib.no as outgoing server.
- Press Create, in the next window, to create the account.
For the account to work off campus the following steps must also be completed: - Go to Mail->Preferences->Accounts and mark/choose the account.
- Press the arrows next to Outgoing Mail Server, choose Edit SMTP Server List... and then Advanced.
- Choose Use custom port and type in 465.
- Check the box indicating the use of SSL, choose password authentication and fill in your user information.
OBS! For students the server name is, as declared eralier, smtp.student.uib.no!


