Mac OS X: Setting up an account in Mail: Difference between revisions
From IThelp
(Created page with '{{BRA}} no:Oppsett av e-post i Mail (Mac) Mail is the name of Apples mail client. File:App mail.jpg == Setting up an Exchange account in Mail (only for employees with…') |
m (Removed category that was st and created by a mistake.) |
||
| Line 27: | Line 27: | ||
# Set smtp.student.uib.no as outgoing server. <br/>[[File:Server outgoing.png]]<br/> | # Set smtp.student.uib.no as outgoing server. <br/>[[File:Server outgoing.png]]<br/> | ||
# Press Create, in the next window, to create the account. | # Press Create, in the next window, to create the account. | ||
Revision as of 19:01, 19 December 2011
Mail is the name of Apples mail client.

Setting up an Exchange account in Mail (only for employees with an Outlook membership)
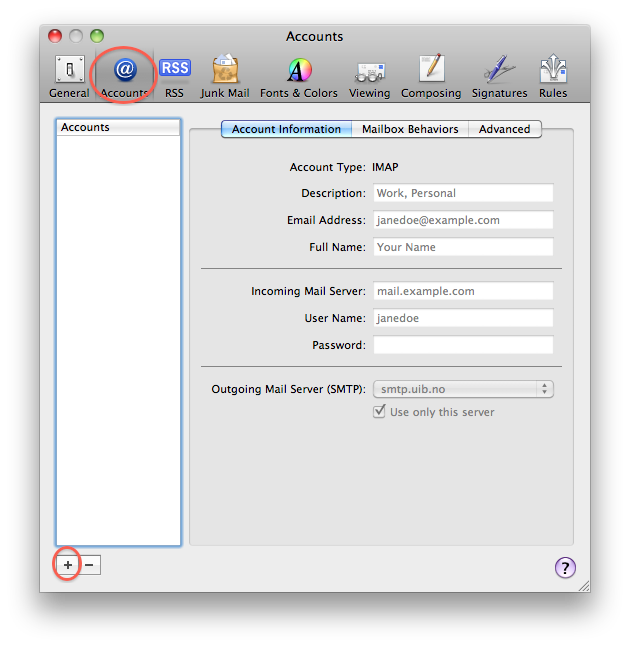
- Go to Mail -> Preferences. Choose Accounts press the plus sign to add a mail account.
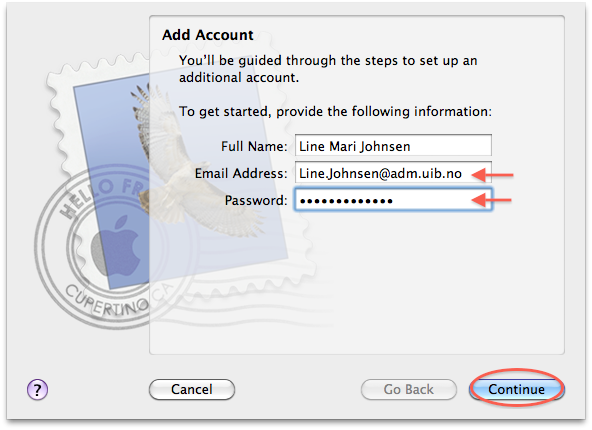
- Type in your mail address and your password.
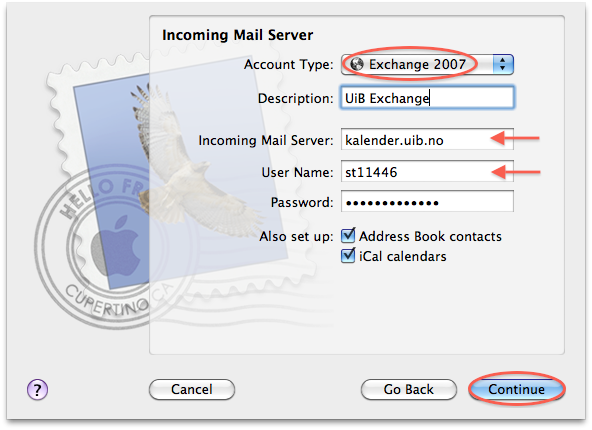
- Choose "Exchange 2007" as the account type, set kalender.uib.no as incoming server and make sure the right user name is listed.
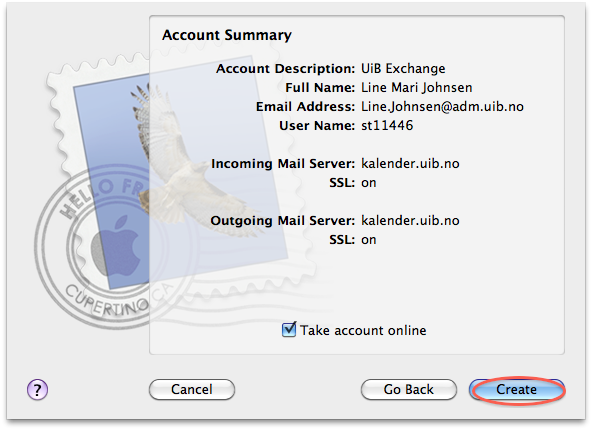
- Check the information and press Create to create the account.


Setting up an IMAP account in Mail as an employee
- Go to Mail -> Preferences. Choose Accounts press the plus sign to add a mail account.
- Type in your mail address and your password.
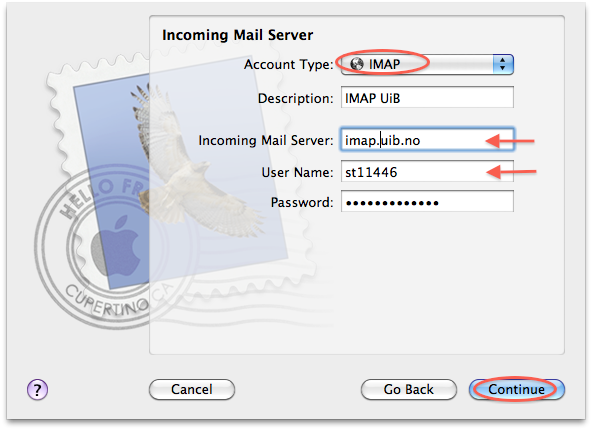
- Choose "IMAP" as the account type, set imap.uib.no as incoming server and make sure the right user name is listed.
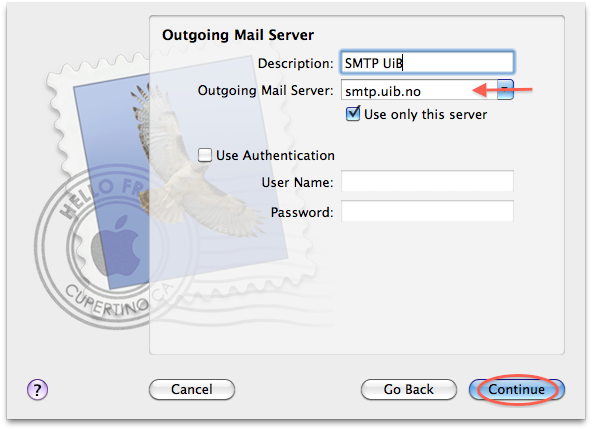
- Set smtp.uib.no as outgoing server.
- Press Create, in the next window, to create the account.


Setting up an IMAP account in Mail as a student
- Go to Mail -> Preferences. Choose Accounts press the plus sign to add a mail account.
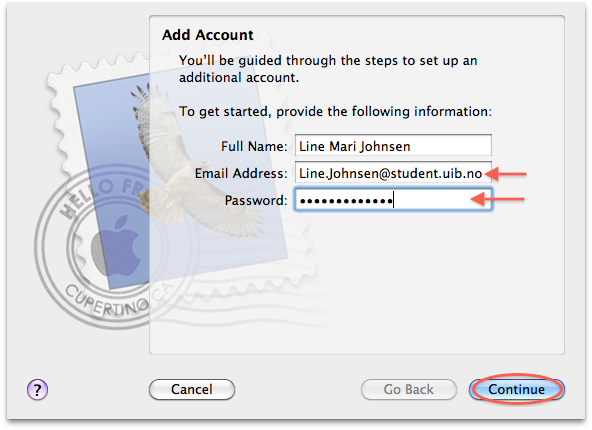
- Type in your mail address and your password.
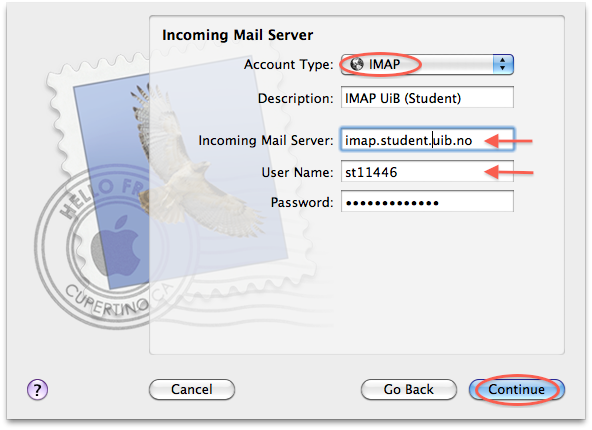
- Choose "IMAP" as the account type, set imap.student.uib.no as incoming server and make sure the right user name is listed.
- Set smtp.student.uib.no as outgoing server.
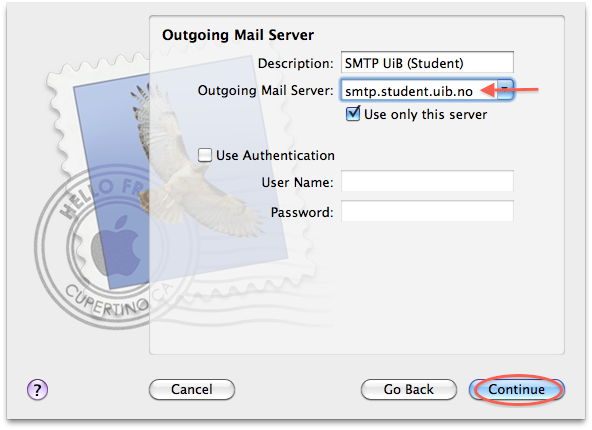
- Press Create, in the next window, to create the account.


