Eduroam configuration in Mac OS X: Difference between revisions
No edit summary |
No edit summary |
||
| Line 1: | Line 1: | ||
[[image:eduroam_logo.gif]] | [[image:eduroam_logo.gif]] | ||
Make a network profile for 'eduroam' | Make a network profile for 'eduroam' | ||
Revision as of 09:03, 4 March 2010
Make a network profile for 'eduroam'
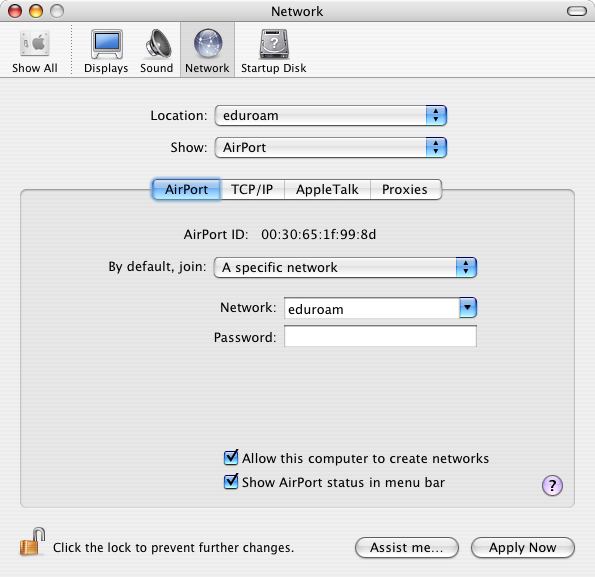
- Open System Preferences
- Select Network
- Select New Location...
- Select Show Network Port Configuration
- Check so only Airport (WLAN) is active
- Select Show Airport
- Select By default, join a specific network
- Type eduroam in the field Network. Let the password field remain blank.
- Go to the TCP/IP configuration. Verify that Using DHCP is selected.
The screen dump below shows the configuration of a new network profile called eduroam.
To make the eduroam profile work, it must be correctly configured using IEEE 802.1X
- Start the program Internet Connect
- Select the 802.1X tab
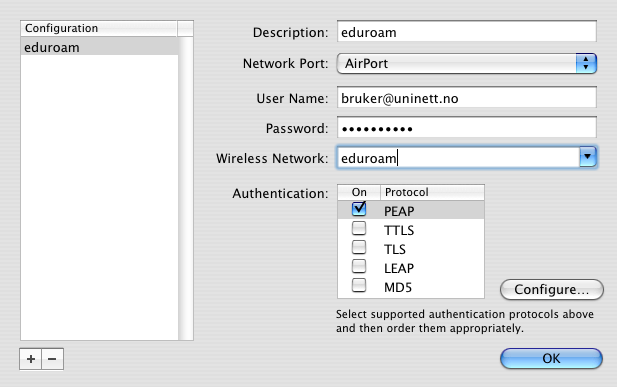
- Select Configuration: Edit Configurations...
- Type eduroam as a description
- Select Network Port Airport
- Enter your user name and password
- Select Wireless Network: eduroam
- Drag PEAP to the top of the list of authentication methods
- Press OK
The screen dump shows the configuration of 802.1X
After entering the configuration for the first time, you have to manually press Connect to connect. The next time you choose Location: eduroam from the "apple menu" you are automatically connected to the correct WLAN using 802.1X.
The first time you connect you will get a request to verify a certificate. Check it's authenticity and press Accept. If you already have installed the Certificate Authority (CA) public certificate correctly in your Keychain, this question will not appear.
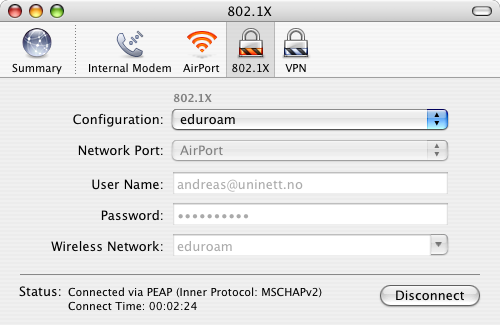
The screen dump shows a working connection.


