OneNote - Synchronization Problems: Difference between revisions
Created page with "{{Under construction}} en:OneNote - Synchronization Problems Etter omleggingen av student-domenet i slutten av desember har en del studenter og enkelte ansatte opplevd p..." |
oppfordrer til bruk av mac guide |
||
| (10 intermediate revisions by the same user not shown) | |||
| Line 1: | Line 1: | ||
[[no:OneNote_-_Synkroniseringsproblemer]] | |||
Following the reorganization of the student domain at 16th December 2017, some students and some employees have encountered problems with the synchronization of notebooks in OneNote.<br /> | |||
If you have problem synchronize on a Mac, [https://it.uib.no/OneNote_for_Mac_-_Synkroniseringsproblemer you might try this guide] (norwegian) | |||
For PC, you can follow the description below: | |||
You'll find the link to this notebook in the "FILE / FIL" menu at the top left. | |||
The illustration below shows a document that after the reorganization has stopped syncing (see the red cross at top left). In addition, changes have been made that are not synchronized. | |||
| Line 17: | Line 18: | ||
== | ==Solution:== | ||
Create a new notebook in OneDrive and copy the content, that is not synced, to the new one. | |||
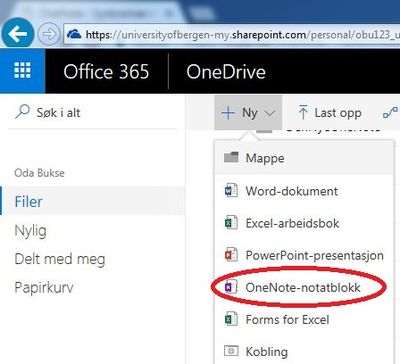
Steps: Log on to http://office365.uib.no/ (Log in with username@uib.no) | |||
* | * Click on "OneDrive" | ||
| Line 31: | Line 32: | ||
* | * Create a New Folder | ||
| Line 38: | Line 39: | ||
* | |||
* Give the folder a name (eg NyPlassering) | |||
| Line 45: | Line 47: | ||
* | |||
* Create a new Notebook in the folder (NyPlassering) | |||
| Line 52: | Line 55: | ||
* | |||
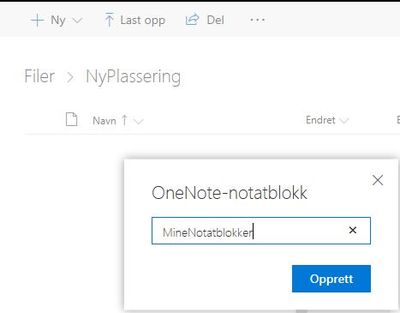
* Give the new Notepad a name. In this case it has been called "MineNotatblokker. | |||
| Line 62: | Line 66: | ||
* | You will now see that a new Notebook has been created in the online version of Office 365. | ||
* Click '' ' "Open In OneNote/Åpne I OneNote"' '' to open this notebook in the OneNote program. | |||
| Line 71: | Line 76: | ||
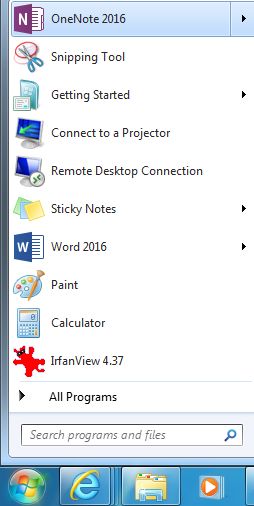
* | * Once you have opened OneNote from your browser, open OneNote again from your PC so you have two running simultaneously. | ||
[[File:NyOneNoteInstans.jpg|300px]] | [[File:NyOneNoteInstans.jpg|300px]] | ||
| Line 78: | Line 82: | ||
* | * In this instance of Onenote you open the notepad that does not sync (in this case, "Oda @ University of Bergen") | ||
* | * Add these next to each other. | ||
* | * Then, drag all the "sections" from the old one (which does not sync) to the new one. To drag a section over, hold down the ctrl key as you drag it over with the mouse (left mouse button). | ||
( | (VERY IMPORTANT TO HOLD DOWN THE CTRL KEY WHILE DRAGGING THE SECTIONS OVER TO THE NEW NOTEBOOK) | ||
Do this for all the sections you want to copy over to the new notebook. | |||
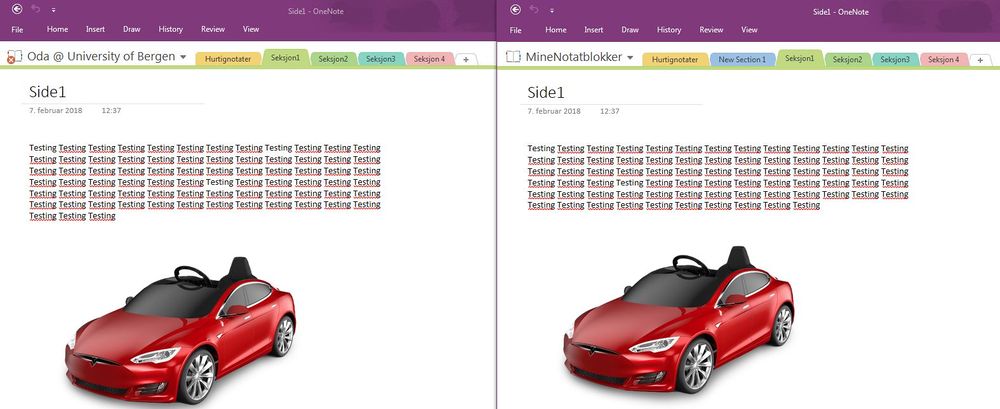
Below you will see the end result where all sections from the old notepad are synchronized to the new one. | |||
| Line 96: | Line 100: | ||
When all sections are copied to a notebook that synchronizes, close the notebook that does not sync. | |||
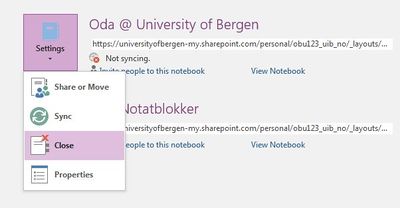
To do this, go to the "File / File" menu at the top left. Then click on "Settings" for the notebook you no longer need (which does not sync). In the menu that pops up, press a "Close". | |||
[[File:CloseOneNoteFile.jpg|400px]] | [[File:CloseOneNoteFile.jpg|400px]] | ||
Latest revision as of 12:57, 12 April 2018
Following the reorganization of the student domain at 16th December 2017, some students and some employees have encountered problems with the synchronization of notebooks in OneNote.
If you have problem synchronize on a Mac, you might try this guide (norwegian)
For PC, you can follow the description below:
You'll find the link to this notebook in the "FILE / FIL" menu at the top left.
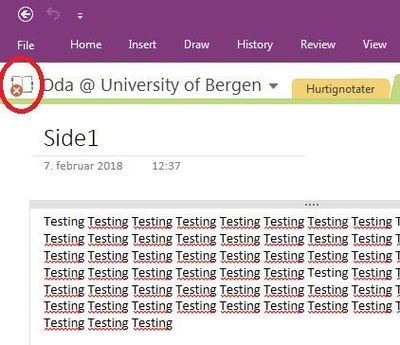
The illustration below shows a document that after the reorganization has stopped syncing (see the red cross at top left). In addition, changes have been made that are not synchronized.
Solution:
Create a new notebook in OneDrive and copy the content, that is not synced, to the new one.
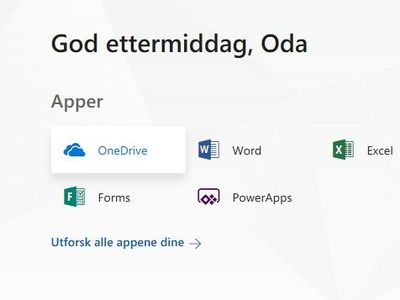
Steps: Log on to http://office365.uib.no/ (Log in with username@uib.no)
- Click on "OneDrive"
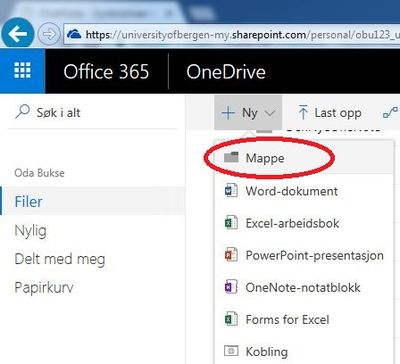
- Create a New Folder
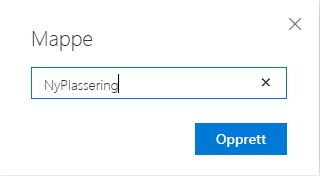
- Give the folder a name (eg NyPlassering)
- Create a new Notebook in the folder (NyPlassering)
- Give the new Notepad a name. In this case it has been called "MineNotatblokker.
You will now see that a new Notebook has been created in the online version of Office 365.
- Click ' "Open In OneNote/Åpne I OneNote"' to open this notebook in the OneNote program.
- Once you have opened OneNote from your browser, open OneNote again from your PC so you have two running simultaneously.
- In this instance of Onenote you open the notepad that does not sync (in this case, "Oda @ University of Bergen")
- Add these next to each other.
- Then, drag all the "sections" from the old one (which does not sync) to the new one. To drag a section over, hold down the ctrl key as you drag it over with the mouse (left mouse button).
(VERY IMPORTANT TO HOLD DOWN THE CTRL KEY WHILE DRAGGING THE SECTIONS OVER TO THE NEW NOTEBOOK)
Do this for all the sections you want to copy over to the new notebook.
Below you will see the end result where all sections from the old notepad are synchronized to the new one.
When all sections are copied to a notebook that synchronizes, close the notebook that does not sync.
To do this, go to the "File / File" menu at the top left. Then click on "Settings" for the notebook you no longer need (which does not sync). In the menu that pops up, press a "Close".
